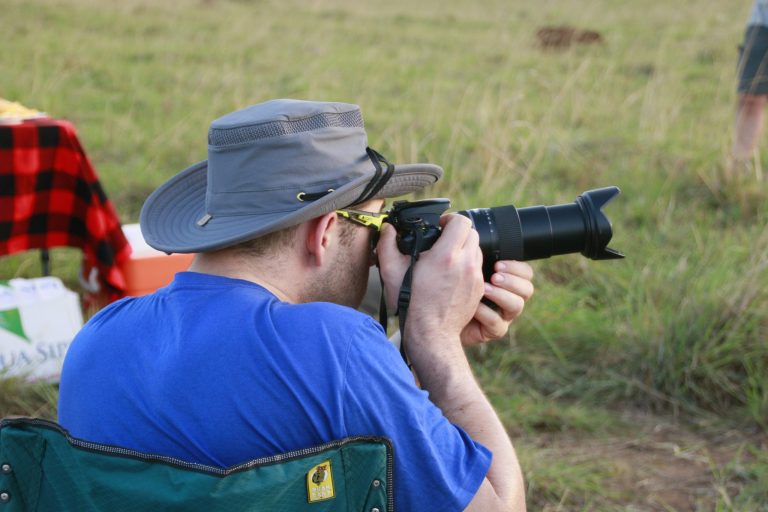
The best lens for safari is a stabilised super telephoto zoom that reaches 400 to 600mm, such as a 100 to 400mm, a 100 to 500mm or a 200 to 600mm, because it frames distant lions, cheetahs and birds yet still zooms out when an elephant walks past the vehicle. It suits game drives in the Masai Mara, Serengeti and Queen Elizabeth. For gorilla trekking in Bwindi or Volcanoes, a brighter 70 to 200mm handles the dim forest light better.
Camera bodies have their own page, the best camera for safari, and binoculars are covered in our safari camera and binoculars guide. The settings for the forest hour sit in gorilla trekking photography.
How Much Zoom a Safari Game Drive Really Needs
Reach is the first question on every wildlife safari, and the honest answer is more than most people pack. Animals rarely stand where the light is good and the road runs close. A leopard on a sausage tree branch, a serval in long grass, a martial eagle on a dead snag: these sit fifty to two hundred metres from the track, and vehicles in national parks must stay on it.
Photographers who have done several safaris tend to settle around 400mm as the useful minimum for mammals. Below about 300mm you get the animal small in a wide frame, which can work for scenery but leaves most sightings as specks. Birds push the number higher. A lilac breasted roller is the size of a thrush, and at 400mm it still fills a small part of the frame.
Is a 200mm lens enough for wildlife? Sometimes. Forum regulars often call 200mm the floor for a safari, and it works for elephants at the roadside, lions resting by the track, the Ngorongoro Crater and gorillas in the forest. It falls short for cats on the far side of a lugga and for almost every bird. A 200mm on a crop body frames like 300mm, and a 1.4x teleconverter turns it into 280mm, which narrows the gap without solving it.
Crop factor changes the maths. A crop sensor (APS C) body multiplies the field of view by about 1.5 on Nikon, Sony and Fujifilm, and about 1.6 on Canon, so a 100 to 400mm frames like a 150 to 600mm on full frame. Micro Four Thirds doubles it, which is why a small Olympus or Panasonic kit with a 100 to 400mm lens punches far above its weight. Many safari regulars shoot crop bodies for exactly this reason.
Cropping in editing helps too, up to a point. Modern sensors hold plenty of detail, so a sharp frame at 400mm can be cropped to look like 600mm. Push it further and the fur turns to mush.
Park type matters more than most guides admit. The open short grass of the southern Serengeti and the Masai Mara rewards long reach, since animals spread out and you often cannot get closer. In the Ngorongoro Crater, Lake Nakuru and Queen Elizabeth’s Kasenyi plains, animals sit nearer the tracks, and elephants regularly walk so close that a 400mm only fits an eye. Brushy parks such as Akagera hide animals in thicket, so a zoom that pulls back fast matters more than raw reach. Botswana’s private concessions allow off road driving, so a 100 to 400mm usually covers it. And at midday, heat haze over the plains softens any distant subject no matter how long the lens, which is one more reason the early and late drives produce most keepers.
| Zoom range | Best for | Weight | Budget |
|---|---|---|---|
| 70 to 300mm | First trip | Light | Low |
| 100 to 400mm | All rounder | Medium | Mid |
| 100 to 500mm | Reach, light | Medium | High |
| 150 to 600mm | Birds, plains | Heavy | Mid |
| 70 to 200mm f/2.8 | Gorillas | Medium | High |
| 400mm or 600mm prime | Pro work | Very heavy | Very high |
The All Rounder for Most Safari Trips: 100 to 400mm Zooms
If one lens has earned the title of standard safari lens, it is the 100 to 400mm zoom. Guides who run photo safaris recommend it first, and forum threads from Kenya and Tanzania trips repeat the same verdict: it stayed on the camera for most of every game drive. It reaches far enough for most mammals, zooms out quickly when a lion walks past the bonnet, and still fits in a daypack beside a water bottle.
Every major system makes one. Canon shooters on mirrorless bodies can choose the very light Canon RF 100 to 400mm zoom, which weighs about as much as a full water bottle and suits travellers counting grams. Sony and Nikon each sell their own versions, a Sony FE 100 to 400mm telephoto and a Nikon Z 100 to 400mm, both heavier and brighter with fast focusing that holds a running cheetah.
Crop sensor and Micro Four Thirds owners have strong options as well. A Fujifilm XF 100 to 400mm frames like a 600mm on full frame. The OM System and Olympus 100 to 400mm reaches the equivalent of 800mm and remains small enough to shoot handheld from a pop top roof for an entire morning, and the Panasonic Leica 100 to 400mm does the same job on Lumix bodies at under a kilogram.
Why not something shorter and brighter? Because on the plains, reach beats a wide aperture most of the time. The best light comes in the hour after dawn, when even a slow f/5.6 or f/6.3 zoom works fine on a modern camera at a higher ISO.

Longer Reach for Birding Safaris and Open Plains: 150 to 600mm Zooms
Birders and anyone who wants frame filling shots of distant cats should look at the long zooms. On a birding safari in Uganda, Kenya or the Okavango, 600mm is not excessive. It is the difference between a recognisable bee eater and a coloured dot.
Third party makers built this category. The Sigma 150 to 600mm Contemporary and its Tamron rivals made 600mm affordable for ordinary travellers, and on mirrorless bodies a Tamron 150 to 500mm for mirrorless mounts trims a little reach for a shorter, easier package. Own brand alternatives include the Sony FE 200 to 600mm, which zooms internally so it does not suck dust in as it extends, the Nikon Z 180 to 600mm, also an internal zoom, and Canon’s RF 100 to 500mm L, a favourite of working wildlife photographers because it covers almost everything in one tube.
Canon also sells an RF 200 to 800mm, which costs less than the 100 to 500mm and reaches further, at the price of a slow aperture and a long, heavy barrel. It makes most sense for birders on bright savannah mornings.
The trade is weight and handling. Most lenses in this class sit around two kilograms, three times a light 100 to 400mm. In a crowded minivan with a pop top roof that is manageable on a beanbag. Hand holding it for a three hour drive is another matter, and a long zoom is clumsy when an elephant fills the road. That is why so many people who carry one also keep a shorter lens on a second body.
Teleconverters stretch any of these further. A 1.4x teleconverter turns 400mm into 560mm and costs one stop of light; a 2x costs two stops and softens many zooms noticeably. Check compatibility before buying, since several budget and third party zooms do not accept them at all. A converter weighs far less than a second long lens, which is why some photographers pack one in place of extra glass.
Best Safari Lens by Camera System: Canon, Nikon, Sony, Fujifilm and OM System
The right safari lens starts with the mount on your camera. Adapting lenses from another system can slow autofocus or switch off stabilisation, so the safest picks are your maker’s own glass or a third party lens built for your mount. The table gives the usual first choices for game drives and the forest.
| System | All rounder | Long reach | Forest |
|---|---|---|---|
| Canon RF | RF 100 to 400mm | RF 100 to 500mm | RF 70 to 200mm |
| Nikon Z | Z 100 to 400mm | Z 180 to 600mm | Z 70 to 200mm |
| Sony E | FE 100 to 400mm | FE 200 to 600mm | FE 70 to 200mm |
| Fujifilm X | XF 100 to 400mm | XF 150 to 600mm | XF 50 to 140mm |
| OM and Lumix | 100 to 400mm | 150 to 400mm | 40 to 150mm |
| Canon EF DSLR | EF 100 to 400mm II | Sigma 150 to 600mm | EF 70 to 200mm |
| Nikon F DSLR | 80 to 400mm | AF S 200 to 500mm | 70 to 200mm |
Canon. The RF 100 to 500mm is the lens most professional safari hosts carry on Canon mirrorless, and the light RF 100 to 400mm is the value pick. DSLR owners still do well with the Canon EF 100 to 400mm II, which also works on mirrorless bodies through Canon’s adapter.
Nikon. The Z 180 to 600mm has become the default long lens for Nikon mirrorless owners; it is heavy but sharp and fairly priced. On older Nikon DSLRs the Nikon 200 to 500mm f/5.6 remains one of the best value long zooms ever made for safari.
Sony. The FE 200 to 600mm is the classic choice, the FE 100 to 400mm GM the lighter one. Sony shooters who want one lens for everything look at the Sigma 60 to 600mm, which runs from a herd at the waterhole to a bird on a far branch, though it softens a little in the corners at the long end. The Tamron 50 to 400mm is a lighter one lens option for Sony and Nikon Z bodies.
Fujifilm and Micro Four Thirds. The smaller sensors give reach for free, so a 100 to 400mm frames like 600 to 800mm. OM System’s 150 to 400mm with its built in 1.25x converter reaches up to an equivalent 1,000mm and is a favourite of bird photographers, at a professional price.
Budget and One Lens Safari Kits: 70 to 300mm Zooms, Travel Zooms and Bridge Cameras
A first safari trip does not need flagship glass. A 70 to 300mm zoom remains the most common lens on game drive vehicles across East Africa, and on a crop sensor body it frames like 450mm, which covers a fair share of sightings. Look for a stabilised 70 to 300mm telephoto zoom in your mount; Canon, Nikon and Tamron all make them.
Sony’s crop sensor owners have a particularly good small option in the Sony E 70 to 350mm, which reaches an equivalent of about 525mm and weighs little. Canon’s older 55 to 250mm, often bundled with entry cameras, is a better safari lens than its price suggests.
All in one zooms are the other budget route. An 18 to 300mm or 18 to 400mm travel zoom on a crop body runs from wide scenery to long telephoto without ever taking the lens off, which keeps dust out of the camera. Image quality at the long end is softer than a dedicated telephoto, and they struggle in low light. For travellers who want one lens and no swapping, they still make sense.
Is there a safari lens built into a camera? In effect, yes: the bridge camera. The Sony RX10 IV carries a 24 to 600mm equivalent lens on a 1 inch sensor and is weather sealed, while Nikon’s Coolpix P950 reaches 2,000mm and the P1000 3,000mm on smaller sensors that turn noisy at dusk. In good sun they produce fine pictures for screens and albums, and there is no sensor to clean. Carry several spare batteries, since the lens, screen and viewfinder all draw on one small cell. Our camera guide covers them alongside binoculars.
Buying secondhand is the quiet budget tip. Long zooms hold up well, and a used lens from a reputable dealer often costs a good deal less than new. Buy for the photography you will do after the trip too; a lens that sits in a cupboard for years is a poor bargain.
Lenses for Gorilla Trekking in Bwindi and Volcanoes
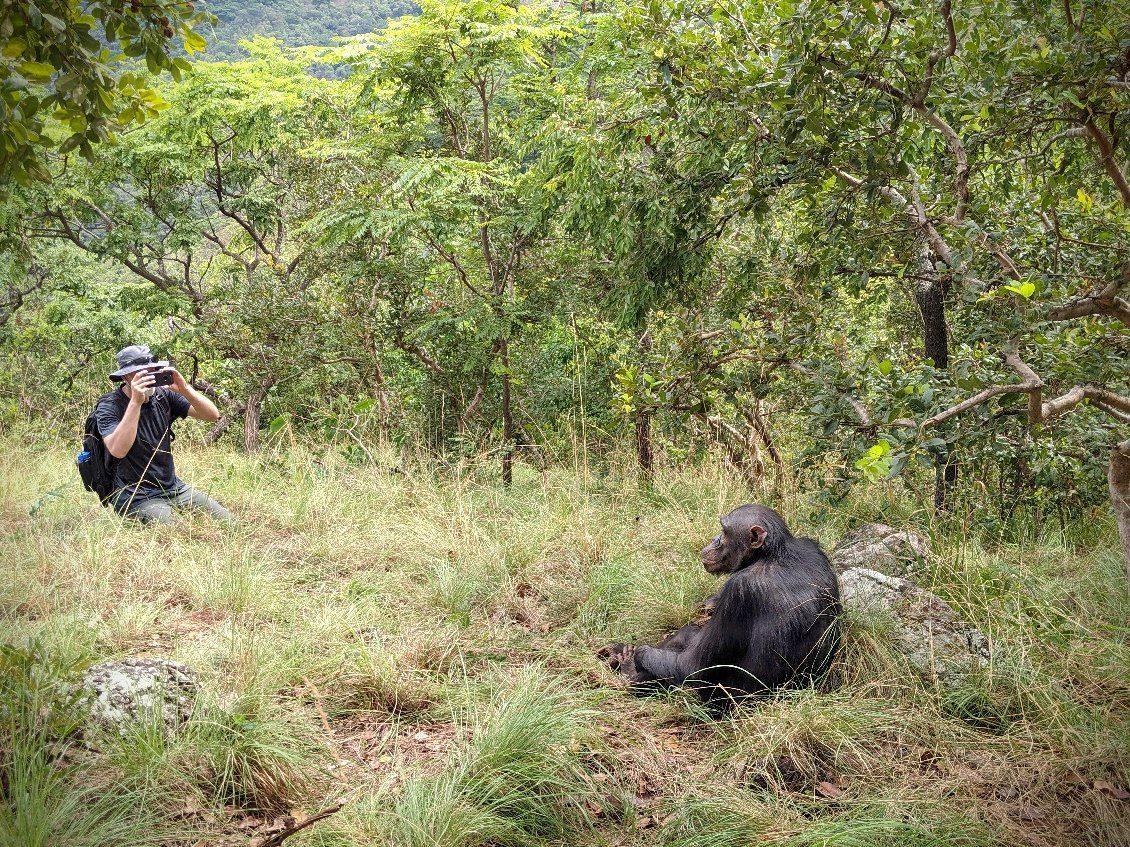
Gorilla trekking asks almost the opposite of a savannah safari. You stand on a slope under thick canopy, often a few metres from the family, and the light is dim even at noon. Flash is banned, the visit lasts one hour, and Uganda Wildlife Authority asks visitors to keep about 10 metres back, while Rwanda’s rule in Volcanoes National Park is 7 metres. Gorillas do not read the rules, so youngsters regularly wander much closer.
A bright 70 to 200mm f/2.8 zoom is the classic gorilla lens. It gathers a stop more light than an f/4 and far more than a slow 100 to 400mm, which keeps shutter speeds high enough to freeze a chewing jaw. In Rwanda it frames an adult’s upper body neatly at 7 metres. In Bwindi, Mgahinga and the wider spacing of Uganda, many photographers wish for more reach, which is why a 100 to 400mm on a body that copes with high ISO is a fair single lens for a combined trip. The f/4 version of the 70 to 200mm saves several hundred grams on a steep climb, and that matters more than people expect when the trek runs three hours and the exit is uphill. Some photo hosts go shorter still and recommend a 24 to 120mm or 28 to 120mm for the forest, since most trekkers end up closer than they expected.
Leave the 600mm in the vehicle. It is too long at forest distances, too heavy for the slopes, and too slow for the light.
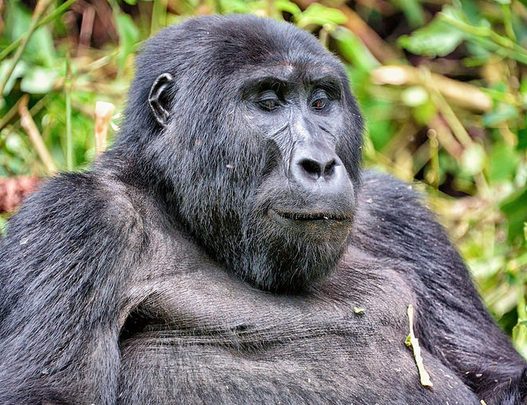
Rain is the other factor. Bwindi sees showers in every month, so pack a rain cover for a telephoto lens and keep the camera inside a dry bag in your gorilla trekking daypack until the trackers call you forward. Exposure settings and the frame width table for each distance are on our gorilla photography page, and the trek itself is explained in the Bwindi gorilla trekking guide.
Wide and Standard Zooms on a Safari Tour
Long lenses miss the scene. The herd crossing a river under a stormy sky, an acacia at dusk, the whole vehicle beside a sleeping lion: these need something wide. A 16 to 35mm wide angle zoom covers sweeping plains and camp at night, while a 24 to 105mm or 24 to 70mm standard zoom handles animals that walk right up to the vehicle, village visits and the lodge. A small 24mm prime is the light option for the odd wide frame and the night sky over camp.
Several trip reports describe the same moment: an elephant steps in so close that the long lens shows only wrinkled skin, and the wide lens is in the bag. Photographers who leave the standard zoom at home often find 70mm too tight and 200mm far too long for these moments. That is the argument for two camera bodies. One wears the telephoto, the other a standard zoom, and you switch cameras instead of lenses; the second body is also your backup if one fails. Two or three lenses covering roughly 20 to 400mm miss very little, and any more just means time lost deciding which to use. Dust on the plains in the dry season is fine and constant, and an open lens mount in a moving vehicle collects it fast. A phone also works well for wide scenery, which makes the second body optional for many travellers.
Fast Prime Lenses and Renting for a Photo Safari
Professional wildlife photographers often shoot big primes: a 400mm f/2.8, a 500mm f/4 or a 600mm f/4. Photographers call these “fast glass” because a wide, fixed aperture lets in far more light than a zoom that closes to f/6.3 at the long end. That extra light is what keeps shooting going at the last minutes of an evening game drive safari, and slow lenses at dusk are the commonest complaint safari photo hosts hear. The big primes also weigh three kilograms or more, need a dedicated vehicle seat or a gimbal, and cost as much as the trip. For anyone on a shared vehicle or a fly in itinerary, they are rarely practical.
Middle routes exist. A 300mm f/2.8 with a 1.4x or 2x converter becomes a 420mm or 600mm and stays fairly light. Canon’s RF 100 to 300mm f/2.8 pairs a fast aperture with zoom flexibility. The 200 to 400mm f/4 and 180 to 400mm f/4 zooms with built in 1.4x converters, from Canon and Nikon respectively, are long time favourites of professional safari leaders. Lighter primes sit in between as well: Nikon’s 500mm f/5.6 PF and Canon’s RF 600mm and 800mm f/11 lenses are compact long lenses that suit bright savannah mornings, though the slow apertures struggle at dusk and in forest.
Renting is the sensible test. Camera rental houses in North America, Europe and South Africa hire long zooms and primes for a week or two, and many photographers rent a 150 to 600mm class lens for a first safari before deciding whether to buy. Rent early, since demand peaks in the July to October migration months, and practise with it at home for a few days before flying. Never take a lens on safari that you have not shot with first.
Lens Features That Matter on Safari: Stabilisation, Sealing, Autofocus and Weight
Spec sheets list dozens of numbers. A handful decide how a lens performs on a safari game drive.
Check third party lenses against your exact camera before buying. Some older adapted zooms focus slowly or lose features on newer mirrorless bodies, and an older DSLR lens on an adapter is not always the bargain it seems. Where you can, try the lens on your own body in a camera shop and take a few frames; how it balances in your hands after ten minutes tells you more than a review.
Shooting with a Long Lens from a Safari Vehicle
A long lens only pays off with the right handling. Keep the shutter speed at roughly twice the focal length or faster, so about 1/800 second at 400mm and 1/1,200 at 600mm, and let the ISO rise to get there. ISO 1,600 to 3,200 is normal at dawn on a modern full frame or good crop body, and today’s noise reduction cleans it well.
Brace everything. Rest the lens on a beanbag or the window frame, tuck your elbows in, and practise this at home from a car window before the trip. Ask the driver to switch off the engine for a sighting. Shoot short bursts as the animal moves rather than one frame at a time.
Use the guide. A good one will place the vehicle for the light and the angle if you explain what you want, and that often does more for your pictures than another 200mm of reach. Ask for early starts and late returns, when animals move and the light is low and warm. And step back from the tight portrait now and then: a lion small in a wide frame of grass and storm cloud tells more of the story than another head shot.
Small habits protect the camera. Some mirrorless bodies can close the shutter when switched off, which shields the sensor during lens changes; turn that setting on. Batteries drain fast with long stabilised lenses, often about one per camera per drive, and cards fill faster than anyone plans, so back up each evening.
Lens Support, Dust and Rain Protection on Game Drives
A tripod is almost useless on a safari vehicle. There is no room to open it, and you cannot step out in most parks. What works is a beanbag: a camera beanbag for vehicle shooting draped over the window frame or roof rail steadies even a 600mm. Pack it empty and ask the first camp or your guide to fill it with rice or beans; most are happy to help. In open sided vehicles in Botswana and South Africa, a clamp on the rail or a monopod between your feet does the same job.
East African vehicles are usually closed with a pop top roof, which suits a beanbag on the roof edge. Open vehicles give a better view but a less stable rest. Ask your operator which type you will be in before choosing your support.
Dust care is a daily routine. Keep a lens cleaning kit with an air blower in your daypack, blow grit off after each sighting before wiping, and cover the camera with a cloth or buff when the vehicle runs behind another on a dry road. Change lenses only inside the vehicle with the windows up, or better, not at all. Clean the gear in your tent each evening, never in the wind. In the forest, a rain cover and a few silica gel sachets in the bag keep humidity off the glass.

Safari Camera Lenses to Leave at Home
Some gear sounds useful and rarely leaves the bag on a safari tour. Clip on phone telephoto lenses are the obvious one: optical quality is poor, alignment slips and the phone’s own zoom usually does better. A cheap 2x teleconverter on a slow consumer zoom gives soft, dim pictures. Full size tripods, as above, do little in a vehicle. A macro lens is worth carrying only if you plan forest walks for insects and chameleons in Bwindi or Kibale.
Bags of lenses are the larger mistake. Three or four lenses mean more changes, more dust and more weight against the bush flight limit. One body with a 100 to 400mm, plus a phone for wide scenery, covers more of a first trip than most people expect. Add a second body only if photography is the main purpose of the safari.
Batteries and cards matter more than a fifth lens. Long zooms with stabilisation drain batteries quickly and camps often charge only from solar panels or a generator in the main area, so pack at least two spares and several cards rather than one large one. The African safari packing list and the gorilla trekking packing list cover the rest of the kit, and every guide in the series is under Safari Gear and Clothing.
Safari Lens FAQ
What lens should I take on a safari?
A stabilised telephoto zoom reaching 400 to 600mm, such as a 100 to 400mm, 100 to 500mm, 150 to 600mm or 200 to 600mm in your camera’s mount. Add a wider zoom on a second body or use your phone for scenery. For gorilla trekking, bring a 70 to 200mm as well.
What is the best lens for safari for a beginner?
A stabilised 100 to 400mm zoom made for your camera, or a 70 to 300mm on a crop sensor body if budget is tight. Both are light enough to hold for a full game drive and long enough for most mammals. Practise with it at home before you travel.
Is a 200mm lens enough for wildlife on safari?
For close animals, roadside elephants and gorillas, yes. For most cats and birds on a game drive it is short on full frame. On a crop body it frames like 300mm, which helps, but most experienced safari photographers aim for 400mm or more.
Is 300mm enough for an African safari?
On a crop sensor body, 300mm frames like 450 to 480mm and covers many sightings. On full frame, 300mm often leaves animals small, especially in the Serengeti and Masai Mara.
Is there a safari lens?
No single lens carries that name, but photographers use the phrase for super telephoto zooms in the 100 to 600mm range. The nearest thing to one safari lens in a box is a bridge camera such as the Sony RX10 IV, with a built in 24 to 600mm equivalent zoom.
What’s the best camera to take on safari?
For most travellers, a crop sensor or full frame mirrorless body with animal eye autofocus and a 100 to 400mm zoom, or a 1 inch bridge camera for simplicity. Our safari camera guide compares the options.
What lens is best for gorilla trekking?
A bright 70 to 200mm zoom, ideally f/2.8, handles the low forest light and close range. In Uganda, where the viewing distance is about 10 metres, some photographers prefer a 100 to 400mm on a body that copes with high ISO. Flash is not allowed.
How much does a good safari lens cost?
Prices vary by brand and change often. As a rough guide, 70 to 300mm zooms typically sell for a few hundred US dollars, 100 to 400mm zooms range from roughly US$600 for the lightest models to around US$2,500 or more for premium versions, third party 150 to 600mm zooms commonly sit around US$1,000 to US$1,500, and big 400mm or 600mm primes run beyond US$10,000. Renting for a week or two costs a fraction of the purchase price, so check current prices and rental rates before deciding.
Do I need two camera bodies on safari?
Not on a first safari. Two bodies help serious photographers avoid lens changes in the dust, one with a telephoto and one with a wider zoom, and give a backup if one fails. Most travellers manage with one camera and a long zoom, using a phone for wide scenery.
Will my lens fit within bush flight weight limits?
Usually, if you plan for it. Light aircraft in Kenya, Tanzania and Uganda typically allow about 15 kg per person including hand luggage and camera gear, and Botswana around 20 kg. A body and a 100 to 400mm leave plenty of room; a 600mm prime may need an extra seat booked through your operator.