The best camera settings for gorilla trekking photography are aperture priority at f/2.8 to f/4, a shutter speed no slower than 1/250s, auto ISO capped around 6400 to 12800, continuous autofocus and RAW files, with every flash and focus light switched off. A 70 to 200mm zoom covers most frames on a Bwindi or Volcanoes trek. Mountain gorillas live under thick forest canopy in Uganda and Rwanda, so low light, close range and one hour shape every decision.
Why Gorilla Trekking Photography Is Different From a Savanna Safari
Gorilla trekking photography turns most savanna habits upside down. On a Masai Mara game drive you shoot from a vehicle in open light at lions tens of metres away. In Bwindi Impenetrable National Park you stand on a slope under a canopy that lets through a fraction of the daylight, the gorillas are a few metres away, and rangers end the visit after one hour.
Three constraints drive everything on this page.
Light. The forest floor is dim even at midday. Where a savanna morning lets you shoot at ISO 400, a gorilla family feeding in thick undergrowth can push the same camera to ISO 6400 or beyond at 1/250s. Then a sunbeam drops through a gap and the contrast jumps: black fur, bright leaves and hard light in one frame is normal.
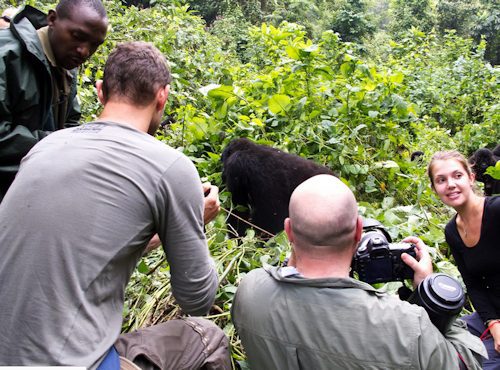
Distance. Uganda Wildlife Authority guidance asks trekkers to keep about 10 metres from the gorillas, while Rwanda’s rule in Volcanoes National Park is 7 metres. Gorillas ignore both numbers. Youngsters wander up to look at boots and a silverback may walk straight past the group, at which point your ranger will ask you to step back. Your lens has to handle a gorilla at 15 metres and the same gorilla at 3 metres within the same minute.
Time. The hour starts when your group reaches the family. Trekkers who come back with the best sets of images tend to have every setting locked before the trackers call the group forward, so no minutes go to menus.
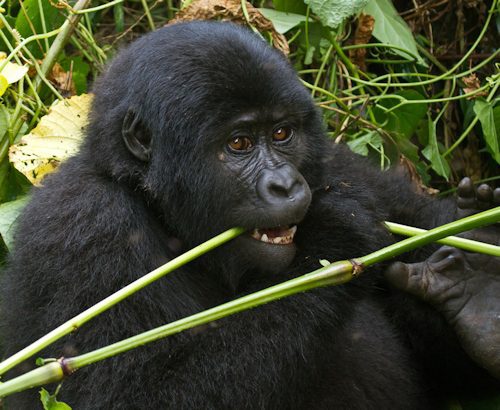
Best Camera Settings for Gorilla Trekking in Low Forest Light
The best camera settings for gorilla trekking start from one decision: protect the shutter speed and let ISO float. A noisy sharp frame can be cleaned up afterwards. A blurred one cannot.
Shooting mode. Aperture priority works well for most people. You pick the aperture, the camera sets the shutter, and auto ISO fills the gap. Set the camera’s minimum shutter speed in the auto ISO menu to 1/250s so it raises ISO before it drops below that. Manual exposure with auto ISO works too: fix f/4 and 1/250s and steer brightness with exposure compensation. Use whichever you know.
New to your camera? Full auto is not a disaster. Some lodge photographers tell first timers to leave it there, and an animal or sports scene mode does better still because it favours a fast shutter. The weakness of auto is that it may pop the flash up in the dark forest, so switch the flash off in the menu first. A handy check for any mode: keep the shutter speed at least twice the focal length, so 1/400s at 200mm, and faster when the gorilla moves.
Aperture. Wide open at f/2.8 gathers the most light, but at a few metres the depth of field is so thin that one eye can be sharp and the other soft. Stopping down to f/4 keeps most of a gorilla’s face sharp and still blurs the forest behind. With two gorillas sitting at different distances, f/5.6 or f/7.1 holds both, at the price of a higher ISO.
Shutter speed by behaviour. Gorillas look slow, yet a chewing jaw and a turning head blur easily at 1/60s. Match the floor to what the animals are doing:
ISO. Cap auto ISO at a level you have tested at home. Recent full frame mirrorless sensors produce usable files at ISO 12800, and modern AI noise reduction in Lightroom, DxO or Topaz makes ISO 6400 files look clean. Older crop sensor bodies may need a cap of 3200 to 6400. Test it weeks before the trip by photographing a dark jacket indoors at night.
Drive and files. Shoot RAW. JPEGs at ISO 8000 lose fur detail you cannot recover. Use a short burst of three to five frames, because gorillas blink often and a burst gives you an open eye.
White balance. Auto handles forest light reasonably. The Cloudy preset or around 5500K to 6000K gives warmer, more natural fur tones.
Silent shutter. An electronic shutter removes the clack that some habituated gorillas notice. On cameras without a stacked sensor it can bend fast movement, so switch back to the mechanical shutter for a chest beat or a running youngster.
Lenses for Gorilla Trekking at 10 m in Uganda and 7 m in Rwanda
Lens choice for a gorilla trek depends on how much gorilla fills the frame at the distances you will actually stand at. The table shows how wide a scene each focal length covers horizontally on a full frame camera at Rwanda’s 7 metres and Uganda’s 10 metres.
| Focal length | Frame width at 7 m | Frame width at 10 m |
|---|---|---|
| 24mm | 10.5 m | 15 m |
| 70mm | 3.6 m | 5.1 m |
| 135mm | 1.9 m | 2.7 m |
| 200mm | 1.3 m | 1.8 m |
| 300mm | 0.8 m | 1.2 m |
| 400mm | 0.6 m | 0.9 m |
A sitting adult gorilla is roughly a metre across the shoulders. At 7 metres in Rwanda, 200mm frames the upper body of an adult and 300mm is already a face portrait. At 10 metres in Uganda, 200mm frames a seated adult whole, and you need 300mm to 400mm for a tight face. That is why photographers who trek in Bwindi more often wish they had packed something longer than those who trek in Volcanoes National Park, where the 70 to 200mm is close to perfect. On a crop sensor body, multiply the focal length by 1.5 or 1.6 for the same comparison.
The main lens: 70 to 200mm. Most photography guides name this zoom first, and trip reports back them. The f/2.8 version gives a full stop more light. Look for a stabilised 70 to 200mm f/2.8 zoom from Canon, Nikon, Sony, Sigma or Tamron in your mount. The f/4 version weighs several hundred grams less, which matters on a three hour climb with a steep exit, and a lighter 70 to 200mm f/4 zoom is a fair trade if you have a body that handles high ISO well. Our guide to the best zoom lens for safari compares focal lengths.
Reach for Uganda: 100 to 400mm. For Bwindi and Mgahinga, a 100 to 400mm or similar zoom gives you face portraits at 10 metres and also suits chimpanzees high in the Kibale canopy. It is slower, so ISO climbs. Many trekkers who also plan a savanna leg use a 100 to 400mm telephoto zoom as their main safari lens anyway, so it earns its place twice.
Big primes. A few professional photo guides carry a 400mm f/2.8 or 500mm f/4 prime on a second body for Uganda’s longer distance, and the bright aperture helps in shade. For most trekkers these lenses are too heavy for a steep, muddy climb and too long when a juvenile wanders within three metres, so treat them as a specialist option that needs a porter.
Close range: 24 to 70mm or 24 to 105mm. When a juvenile sits two metres from your boots or the whole family gathers in a clearing, you need something wide. A weather sealed 24 to 105mm f/4 standard zoom covers group scenes, trekkers in the forest and the gorilla in its habitat.
Two bodies or one. Changing lenses in a humid forest invites fogging and dust, and it costs seconds that matter. If you own two bodies, put the 70 to 200mm on one and a wide zoom on the other. If you own one, pick the zoom that matches your country from the table above and leave it on all hour.
Choosing a Camera Body for Gorilla Trekking Safaris
A camera for a gorilla trekking safari needs three things above all: clean files at high ISO, autofocus that locks in dim light, and decent weather sealing.
Full frame against crop sensor. Full frame sensors give roughly a stop of cleaner high ISO, which matters more in Bwindi than almost anywhere else you will photograph wildlife. A crop sensor adds reach, which helps at Uganda’s 10 metres and with chimpanzees. If you are buying, a weather sealed full frame mirrorless body from Sony, Canon or Nikon is the stronger forest tool. Recent models detect animal eyes, though thick foliage still confuses them.
Mirrorless or DSLR. Mirrorless bodies brighten the viewfinder in dark forest, focus better in low light and shoot silently. If you already own a capable DSLR, take it: battery life is longer, though its autofocus gives up sooner as the light falls.
Bridge and compact cameras. A one inch sensor bridge camera with a long zoom is light and simple, and it does well in a canopy gap. In deep shade its small sensor gets noisy quickly.
Stabilisation. In body stabilisation plus a stabilised lens lets you hand hold at 1/125s for resting animals. It does nothing for a moving gorilla, which is why the shutter floor stays at 1/250s for most frames.
For a wider look at kit for the whole trip, including binoculars for birding and savanna game drives, see our guide to cameras and binoculars for a gorilla safari and the full Safari Gear and Clothing section. Our guide to things to do in Bwindi suggests other subjects for the camera, from birds to waterfalls.
Exposure, Focus and No Flash on a Gorilla Trek
Black fur in a dark forest is the hardest exposure problem on any gorilla trek, and the guides disagree about the fix. One camp says dial in minus one to minus two stops; another shoots at plus 0.7. Both are right, for different frames, and knowing why saves the hour.
A camera meter tries to make everything mid grey. When a gorilla fills most of the frame, the meter sees a big dark shape, brightens it, and turns black fur grey with blown highlights on the leaves: dial in negative compensation, around minus 0.7 to minus 1.3. When the gorilla is small in the frame against bright leaves or a patch of sky, the meter darkens the scene and the gorilla turns into a featureless silhouette: dial in positive compensation, plus 0.3 to plus 1. Spot or centre weighted metering placed on the face removes most of the guesswork.
Fur should look black with visible texture, not grey and not inky.
Autofocus. Use continuous autofocus, AF C or AI Servo depending on brand, with animal eye detection switched on. Leaves are the problem. Wide area modes lock onto the stem in front of the face, so move to a single small point or a small zone and put it on the eye. Back button focus helps hold the eye while you recompose.
No flash, ever. Flash photography is prohibited with gorillas in Uganda, Rwanda and Congo, and rangers check cameras and phones before the visit. That ban includes the orange or white AF assist lamp on the front of many cameras, which fires in low light, and the phone torch. Turn off the flash, the AF assist lamp and focus confirmation beeps the evening before, then check again at the briefing.
Composition During the Gorilla Tracking Hour
Good frames on a gorilla tracking visit come from behaviour, not from the animal simply being there. The hour feels long when you arrive and gone when the ranger calls time, so spend the first few minutes watching. See where the silverback sits, which youngsters are restless and where the light falls. Then shoot.
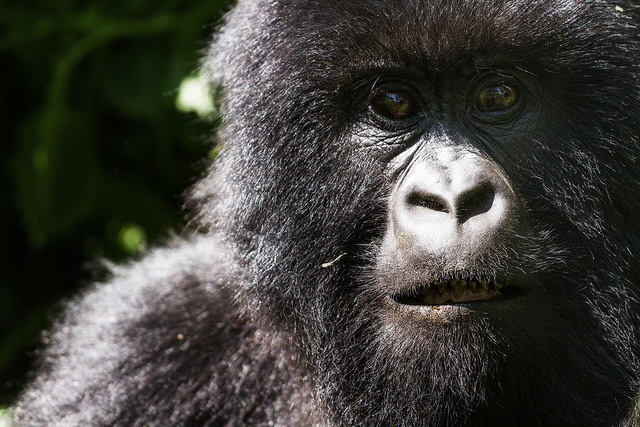
Eyes first. A gorilla portrait lives or dies on a sharp, lit eye. Wait for the head to turn toward a brighter gap so the eyes catch a highlight. Rangers ask you not to hold a gorilla’s stare, so many of the best portraits are three quarter views.
Eye level. Crouch when the ranger allows it. Shooting down at a sitting gorilla flattens it; shooting level gives weight and presence. The walking stick handed out at the briefing makes a steady brace.
Use the foliage. Clean backgrounds are rare. Shoot through a gap in the leaves with the lens close to the nearest stems so they melt into a soft frame around the face.
Expression over anatomy. The frames people keep are the ones with a mood in them: a mother checking her infant, a silverback looking bored, a juvenile mid somersault. Fill the frame with that, and compose in camera rather than planning to crop later, because a heavy crop of a high ISO file shows every bit of noise.
Story frames. A mother carrying an infant on her back, a juvenile somersaulting down a vine, a silverback stripping bamboo, hands and feet: these show what a trek is actually like. Leave space in the direction a gorilla is looking.
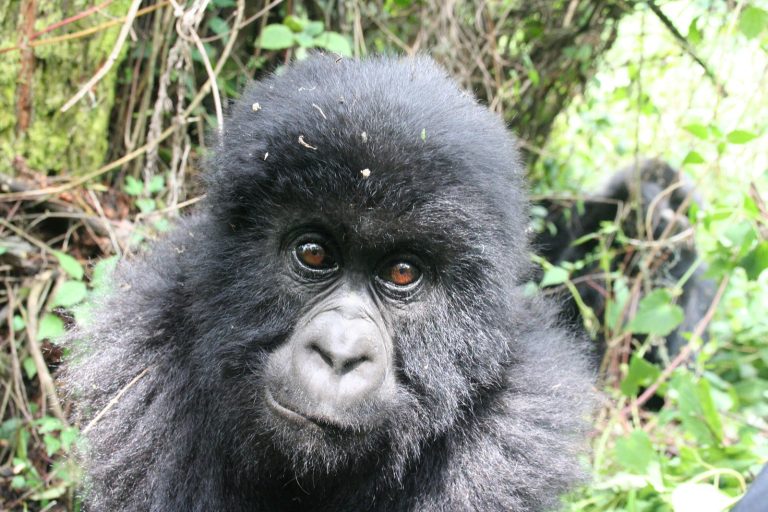
When a gorilla comes to you. Juveniles sometimes walk right up to a kneeling trekker and touch a lens, and big silverbacks such as Busingye in Rushaga have strolled past photographers within arm’s reach. Stay still, keep your face down, and if the ranger says move back, move back. A wide zoom or the phone in your pocket is what saves that moment, not the 400mm.
Then put the camera down. Trip reports keep saying it: spend the last five minutes watching without a viewfinder.
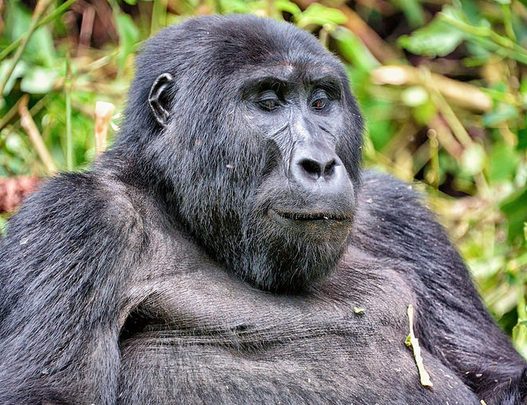
Phone Photography on a Gorilla Trek
Phones are allowed on a gorilla trek, and plenty of trekkers bring nothing else. Recent phones handle close gorillas well in a canopy gap and struggle in deep shade.
Use the right lens. The main 1x camera has the biggest sensor and the brightest lens, so it gives the cleanest files in the forest. The 3x or 5x telephoto works when there is light. Avoid pinching past the longest optical lens; digital zoom on a dark forest scene turns fur into mush.
Tap and slide. Tap on the gorilla’s face to focus, then drag the exposure slider down so black fur stays black and the bright leaves keep their detail. Some photographers pull it a long way down and lift the shadows later; a dark phone file recovers better than a blown one. Night mode can help with a gorilla that is sitting still, but it blurs anything that moves, so switch it off for active animals.
Video. Phones shine at video. Record 4K clips of a feeding session or a youngster playing; you can pull still frames from them later.
Settings to kill. Flash off, torch off, shutter sound off, and leave selfie sticks behind, since rangers ask trekkers not to use them near the gorillas. A waterproof phone pouch on a lanyard keeps it dry on the hike and in your hand when the trackers call you forward.
Plenty of people trek with a phone only and come home happy, especially those who mainly want video and a few close portraits. If you are weighing a phone against buying a camera for the trip, our best camera for safari guide compares the options for the whole holiday, savanna included.
Practising for a Gorilla Photography Safari Before You Fly
The single most useful thing you can do for gorilla photography happens at home. On the trek there is no time to find the exposure compensation dial or the autofocus mode, and the light is worse than anything most people have shot in.
Recreate it. Photograph a dark dog in a park at dusk, or a friend in a black jacket under trees late in the afternoon. Run the camera at the settings in this guide, look at the files at full size, and find the ISO where noise starts to bother you. That number is your auto ISO cap.
Learn your controls by feel: exposure compensation, switching between a wide area and a single focus point, and turning the burst on and off. Wear the rain sleeve while you practise, since it changes how the buttons feel. If you plan to use AI noise reduction, run a few of the practice files through it before you go, so you know how far you can push the ISO with confidence.
Finally, walk a hill with the camera bag you plan to carry. Twenty minutes on a slope tells you whether the strap, the clip or the porter plan works.
Rain, Humidity and Carrying Camera Gear on the Trek
Rain can fall in any month on a Bwindi gorilla trek, often as a short heavy shower in the afternoon, and the forest stays damp even on dry days.
Rain on the camera. Fit a lens hood, which keeps drops off the front element. Carry a camera rain sleeve sized for a telephoto lens, which covers body and lens while leaving your hands free to work the controls. Rwanda bans plastic bags and confiscates them on arrival, so the old bin liner trick is not an option there.
In the pack. Line your daypack with a roll top dry bag of around 20 litres and keep spare batteries, cards and the second lens inside it. Drop a few silica gel desiccant packets in with the camera overnight at the lodge.
Condensation. Moving a cold camera into warm, wet air fogs the lens, inside and out. Leave the camera in its bag for a while after a cold early drive so it warms gradually, and avoid lens changes in the forest. Carry two microfibre cloths and a small air blower in a sealed pocket, one cloth for the lens and one for your hands.
Batteries and cards. Cool mornings at altitude, a long walk in and a mirrorless viewfinder running all hour drain batteries faster than at home. Carry at least two spares in an inside pocket where body heat keeps them warm, plus a USB C dual battery charger for lodges where sockets are few. Bring fast UHS II memory cards with room for a few thousand RAW files, and never format a card until the files are backed up twice.
Carrying it. The walk in can be thirty minutes or five hours, on steep, muddy ground where you need both hands. A strap mounted camera clip holds the camera on your pack strap so it does not swing into rocks. Hiring a local porter is the single best move for photographers: they carry the bag, lend a hand on slippery sections and hand you the camera when the gorillas appear. Gardening gloves help with nettles and vines on the climb; see our gorilla trekking gloves guide, and pair the camera cover with a proper rain jacket for gorilla trekking.
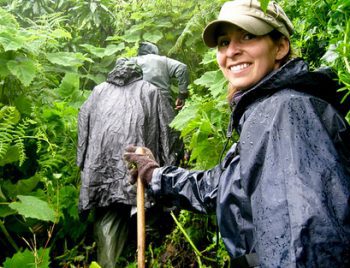
Ethical Gorilla Photography: Rules on the Trek
The rules on a gorilla trekking experience exist to protect a species that shares most of its DNA with us and catches human colds and flu easily. Every one of them affects how you photograph.
Distance. Keep about 10 metres in Uganda and 7 metres in Rwanda, as your ranger instructs on the day. If a gorilla walks toward you, the rule is that you move back, not that you hold your ground for the shot.
Flash and lights. No flash, no AF assist lamps, no phone torches.
Group size and time. A maximum of eight visitors joins each habituated family, and the visit lasts one hour.
Tripods, monopods and drones. Tripods are impractical in the undergrowth and rangers rarely want them set up near a family. Some allow a monopod; ask at the briefing, and treat your walking stick as the default support. Drones are not permitted over the parks on gorilla treks.
Face masks. Rangers may ask you to wear a mask for the hour, since gorillas catch human colds and flu easily. Masks fog glasses and viewfinders, so pinch the nose wire tight and practise shooting with one on. If it slips while a youngster is close, fix it as soon as the gorilla moves away.
Behaviour. Keep voices low, do not eat or drink near the gorillas, and tell your ranger if you are unwell, since you may be asked to stay behind. If a silverback charges, crouch, look down and follow the ranger.
After the trek. Do not post the precise location of a family. For the full code of conduct see our main guide to gorilla trekking in Bwindi.
Habituation Experience and Chimp Tracking for Photographers
If photography is the main goal of your trip, the gorilla habituation experience in southern Bwindi, mainly the Rushaga sector, is worth a serious look. Groups are capped at four visitors, and you spend up to four hours with a family still being accustomed to people, against one hour on a standard trek. That means more behaviour and more changes of light.
Trekking twice is the other route. A second permit doubles your time and lets you fix whatever went wrong the first time.
Chimpanzee tracking safaris in Kibale Forest need different settings. Chimps move fast, sit high in the canopy and are often backlit against the sky. Expect 1/500s to 1/1000s, a longer lens such as the 100 to 400mm, and positive exposure compensation for dark bodies against bright sky. Our guide to chimpanzee trekking in Kibale covers the experience itself.
Back at the lodge, high ISO RAW files respond very well to AI noise reduction in Lightroom, DxO PureRAW or Topaz. Denoise first, then lift shadows on the fur, pull the greens down slightly and sharpen the eyes.
Gorilla Photography Tours and Photo Safaris in Uganda
A dedicated gorilla photography tour differs from a standard gorilla safari in the details rather than the trek itself. The permits, the one hour and the rules are identical. What changes is the support around them.
A photo host. Specialist photo safaris put a professional photographer with a small group, often no more than seven or eight guests, so the whole group can join one gorilla family. On the trail the host suggests settings as the light changes, and in the evening there is an image review at the lodge. That feedback is the real value: the advice from the first trek is what improves the second.
Two treks, not one. Most photo itineraries book two gorilla treks on consecutive days, often from Buhoma or Ruhija. The first hour tends to go on nerves. On the second, people say they finally have the calm to think about settings and composition. Our page on Bwindi gorilla families explains how rangers assign families, which matters when you trek twice.
Chimps and birds. A typical Uganda photo safari adds two chimpanzee tracks in Kibale, where the best frames come when the troop rests, and often a morning boat in Mabamba Swamp near Entebbe for shoebills, when the light is soft. A pair of safari binoculars earns its weight on those days, since you spot first and photograph second.
Luggage. Light aircraft into Kihihi and Kisoro commonly limit you to about 15 kg per person in soft bags. Photo tours often arrange an extra allowance for camera gear; on a normal trip, ask your operator whether you can buy an extra seat or send heavy kit by road. Keep the camera bag as hand luggage on every flight.
You do not need a photo tour to come home with good pictures. A standard trip, a porter and the settings on this page do the job for most people. The photo tour suits those who want coaching, a second trek built in and companions who will not mind waiting while you finish a burst.
Planning a Gorilla Photography Safari in Uganda and Rwanda
Light and trail conditions change with the seasons. The drier months of June to August and December to February mean firmer paths and more breaks in the cloud, while wetter months bring darker skies and fewer trekkers. Our best time to go gorilla trekking guide sets out the months, and the trekking difficulty and fitness guide explains what the walk asks of you with a loaded camera bag.
Permits sell out for popular dates, so secure them before you plan around the photography; see how gorilla permits are booked in Uganda. Choose Bwindi for the longer distance and wider range of families, or Rwanda gorilla trekking in Volcanoes National Park, where bamboo zones and Rwanda’s 7 metre rule suit a 70 to 200mm lens. Pick a lodge near your trailhead from our Bwindi safari lodges list.
Many photographers build gorillas into a wider East Africa trip. A long lens that was borderline in the forest comes into its own on a Masai Mara safari in Kenya during the migration or on a Serengeti safari in Tanzania, so the 100 to 400mm earns its place on both legs. Western lowland gorilla tracking in the Congo Basin is another option, in even darker and wetter forest; our Congo gorilla trekking page covers it. For the full kit list beyond cameras, use our gorilla trekking packing list, or consider renting gorilla trekking gear.
Gorilla Trekking Photography FAQ
What are the best camera settings for gorilla trekking?
Start with aperture priority at f/4, auto ISO with a minimum shutter speed of 1/250s and a cap of 6400 to 12800, continuous autofocus with animal eye detection, RAW files and a short burst. Raise the shutter to 1/500s for playing juveniles. Switch off flash and the AF assist lamp before the trek, and check the histogram after your first few frames.
Is a 70 to 200mm lens enough for gorilla photography?
In Rwanda, at 7 metres, a 70 to 200mm covers almost everything. In Uganda, where trekkers keep about 10 metres, it frames whole gorillas well but you may want a 100 to 400mm for tight face portraits. Carry something wide as well, because gorillas often come much closer than the rules require.
Can I photograph gorillas with just my phone?
Yes. Use the main 1x lens for close gorillas, avoid digital zoom, tap on the face and lower exposure slightly, and record video. Results are good in canopy gaps and weaker in deep shade. Flash, torch and selfie sticks stay off.
Are flash, tripods and drones allowed on a gorilla trek?
Flash is banned outright, and that includes AF assist lamps and phone torches. Tripods are impractical and rarely allowed near a family; ask your ranger about a monopod and use your walking stick as a brace. Drones are not permitted on gorilla treks.
How do I keep my camera dry on a gorilla trekking safari?
Use a lens hood and a rain sleeve on the camera, a dry bag inside the daypack and silica gel overnight. Avoid lens changes in the forest. Plastic bags are banned in Rwanda, so pack a dry bag rather than relying on bin liners.
Should I hire a porter to carry my camera bag?
For photographers it is the best help you can buy on the day. A porter carries your pack, helps you on steep and muddy ground and keeps your hands free, so you arrive steady enough to shoot. The fee is paid at the trailhead and goes straight to local families.
Is gorilla trekking a real thing?
Yes. Gorilla trekking means walking into the forest with park rangers to spend one hour with a wild but habituated mountain gorilla family. It runs every day in Bwindi and Mgahinga in Uganda, Volcanoes National Park in Rwanda and parts of Congo, with up to eight visitors per family.
Which country is the best for gorilla trekking photography?
Both work. Rwanda’s 7 metre rule and the more open bamboo zones of Volcanoes National Park suit a 70 to 200mm lens and give brighter light. Uganda’s Bwindi has more families, darker forest and a 10 metre rule, so a longer lens helps, and it offers the four hour habituation experience. Our Uganda or Rwanda comparison looks at the whole trip.
How difficult is gorilla trekking really, with camera gear?
Harder than most people expect and easier than the worst stories. The walk to the family can take thirty minutes or five hours on steep, muddy, slippery ground at altitude, and you need both hands at times. With a camera bag, a porter makes a real difference. Moderate fitness and some hill walking beforehand are enough for most trekkers.
Is gorilla trekking worth the money for photographers?
Most trekkers say yes, and photographers more than most, because there are very few places to photograph wild great apes at a few metres. Permits are expensive (see the permit question below), so the value comes from preparation: practise the settings at home, hire a porter and consider a second trek or the habituation experience for more time with the gorillas.
How much do gorilla permits cost, and is there a camera fee?
There is no separate camera fee for still photography by tourists. A Uganda gorilla trekking permit costs US$800 for foreign non residents, US$700 for foreign residents and UGX 300,000 for East African citizens, with a reduced US$600 non resident rate (US$500 foreign resident) announced for April, May and November; those low season permits cannot be rescheduled, and permits are now paid in full at booking. A Rwanda permit in Volcanoes National Park costs US$1,500. Commercial filming needs separate permission from the park authority.
What does the gorilla habituation experience cost compared with trekking?
The habituation experience in Bwindi costs US$1,500 for foreign non residents, and UWA has announced a rise to US$1,800 for that category, so confirm the rate for your dates. It buys up to four hours with the family in a group of four, which many photographers judge better value than two standard permits.